How to Make a Travel Recap, Trip Recap, or Journey Recap Video
Follow these click-by-click Travel Recap app steps to turn any itinerary into a cinematic trip recap or journey recap flyover — then export an MP4 for TikTok, Reels, YouTube, or client deliverables. Worked examples: travel agency, Australia, California, México, business, TikTok, Instagram, and backpacker.
1. Open the Travel Recap editor
Travel Recap is a 3D travel map video maker. You describe a trip; Travel Recap draws a globe flyover with the matching vehicle on each leg, then exports an MP4.
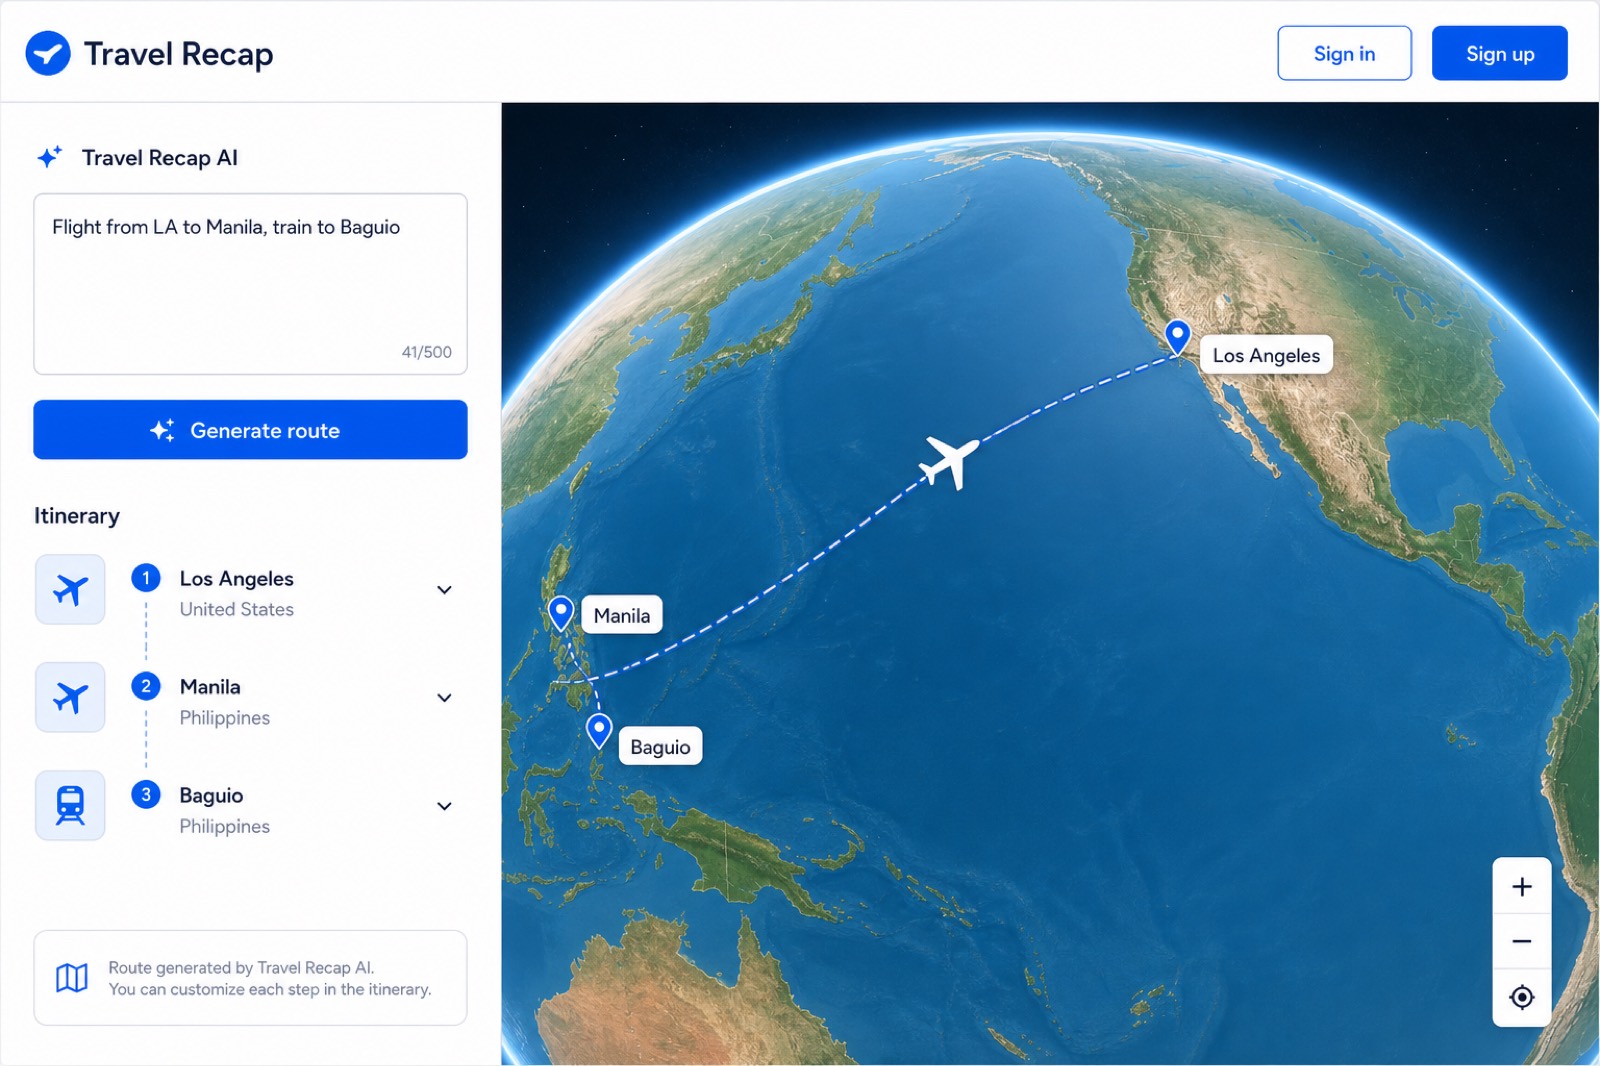
- Open https://travelrecap.app in Chrome, Safari, Edge, or Firefox — or open the Travel Recap iOS or Android app.
- You land in the editor immediately. Do not sign in yet unless you already have an account. Guests can build and preview.
- On desktop web, the left sidebar holds Travel Recap AI, destinations, and Options. The globe fills the right side.
- On mobile web, tap the ☰ menu to reach Sign in, Sign up, pricing, and this tutorial.
iOS / Android: Open Travel Recap, then use the Prompt / Destinations / Settings sections.
2. Generate a Travel Recap route with AI
The fastest way to start a Travel Recap video is the Travel Recap AI box.
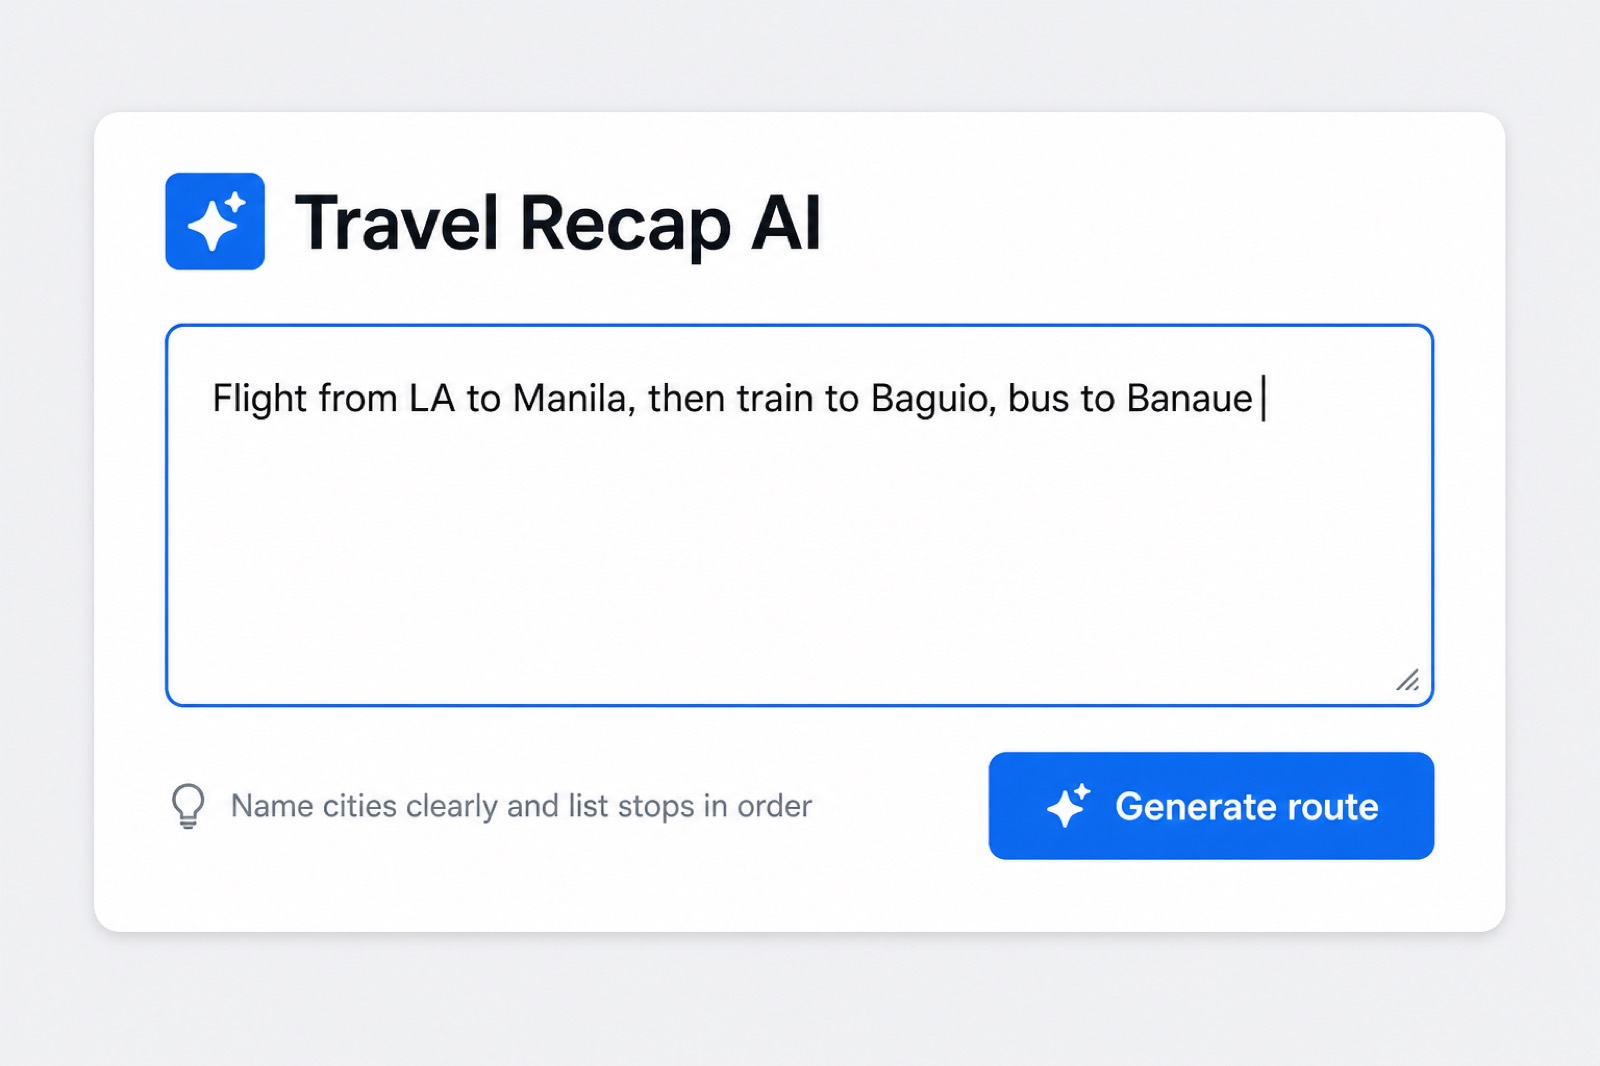
- Click inside the Travel Recap AI text box at the top of the sidebar (web) or Prompt section (iOS/Android).
- Type or paste your trip in order. Name cities clearly and say how you traveled between them.
- Click Generate route (web) or Generate (native). Wait until routing finishes — the button reads Routing….
- Check the destination list. Travel Recap geocodes each stop onto the globe.
Example Travel Recap prompts:
- Flight from LA to Manila, then train to Baguio, bus to Banaue
- Road trip: Miami → Orlando → Atlanta → Nashville, all by car
- Paris to London by train, then flight to Rome, train to Florence
Tip: add a country or state if a city name is ambiguous (e.g. “Portland, Oregon” vs “Portland, Maine”). Free Travel Recap accounts can use up to 15 stops; Pro allows up to 200.
3. Add, edit, reorder, or delete destinations
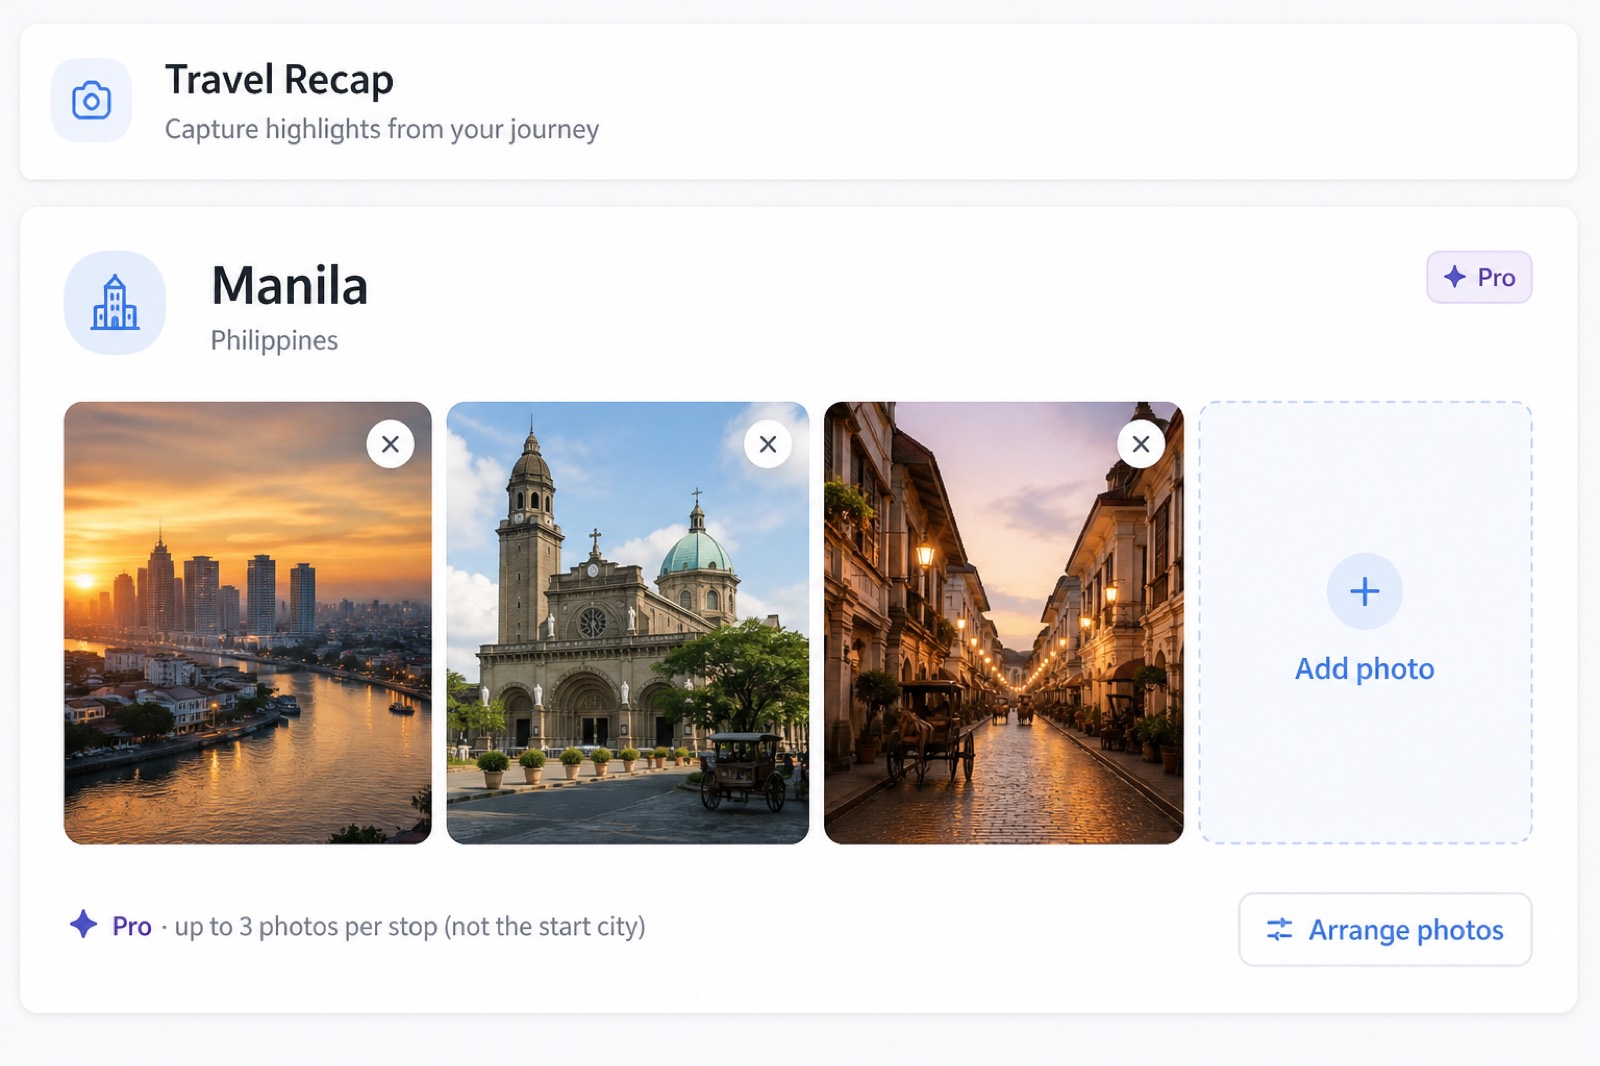
Every Travel Recap video is a list of stops. The first stop is the start point. Later stops can have photos (Pro).
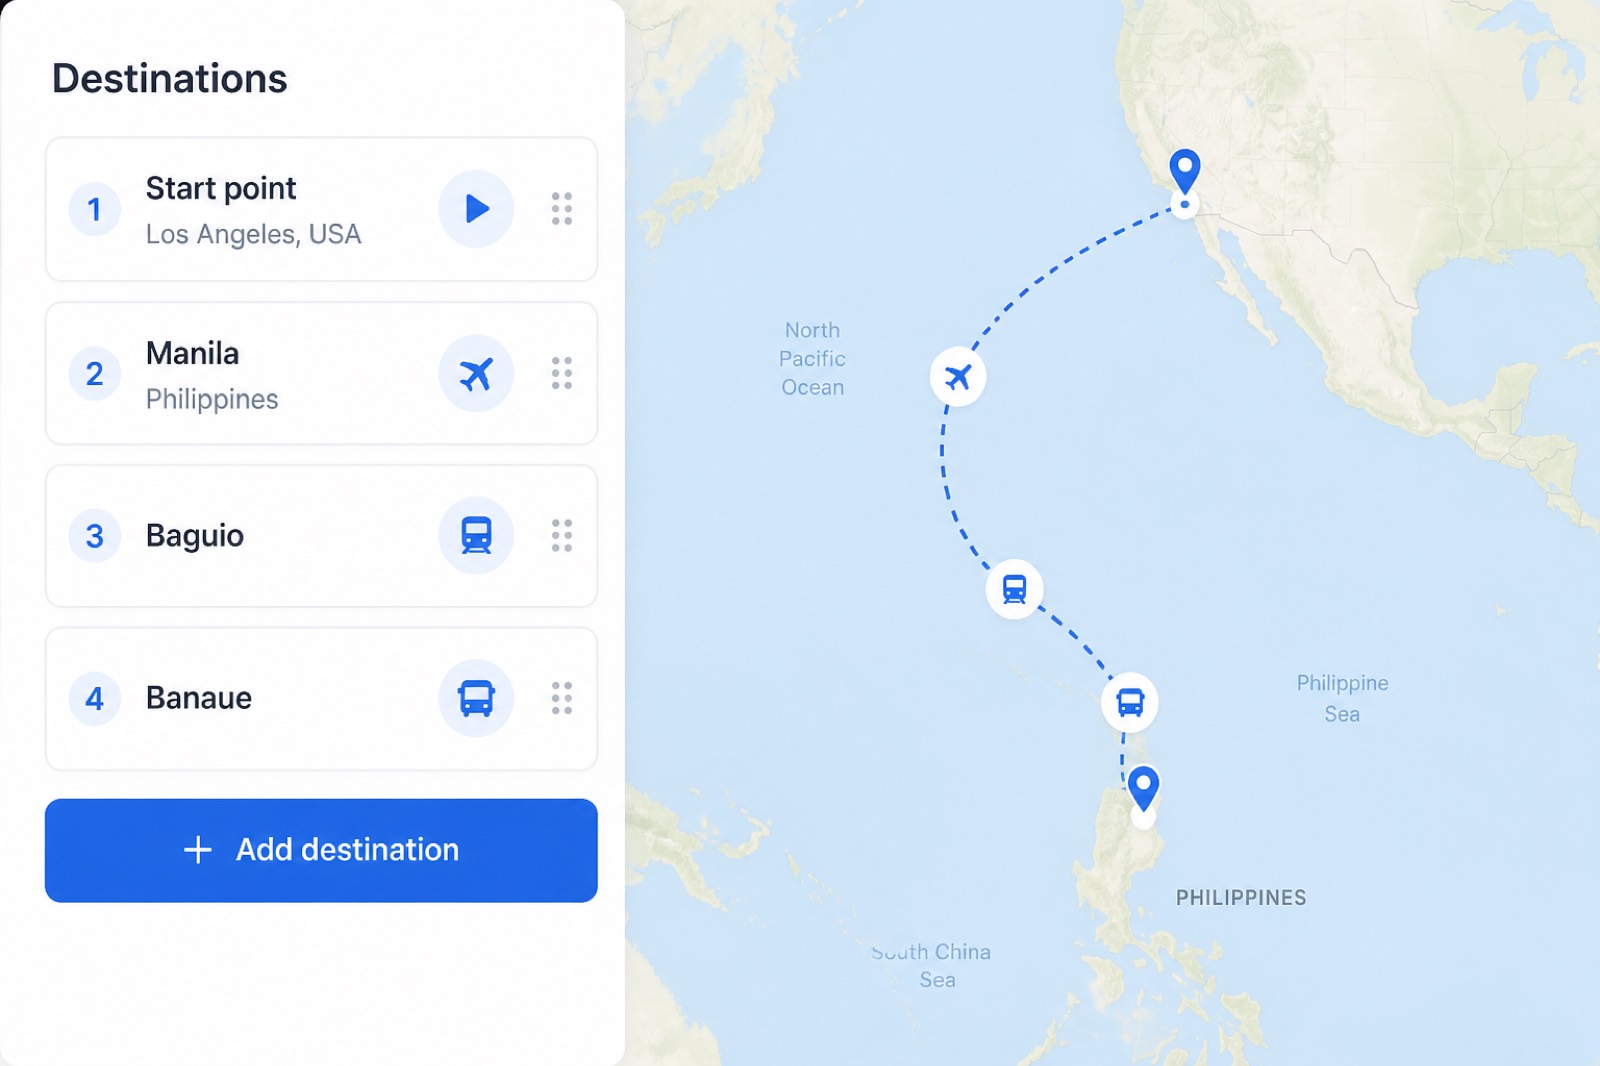
Add a destination
- Stay on the Route tab (bottom of the sidebar on web).
- Click + Add destination (n/max).
- In the Add destination dialog, type a city or place and pick the match.
- Save. The new stop appears at the end of the list and on the globe.
Edit or remove a stop
- Click the pencil (Edit destination) on a row, change the place name, and save.
- Click the trash (Remove destination) to delete a stop. You cannot delete the last remaining stop.
Photos never attach to stop 1 (the start point). Upload photos only from the second destination onward.
4. Choose how you traveled between stops
Travel Recap animates a different vehicle for each leg (flight, train, bus, car, and more).
- On a destination row after the start point, click the transport icon (plane, train, car, etc.).
- In the picker, tap the mode for that leg: Flight, Train, Bus, Car, Bike, Walk, Ferry, Cruise, Helicopter, and others.
- Close the picker. The globe path updates (great-circle for flights; roads/rails where available).
5. Preview the Travel Recap 3D flyover
Always preview before you export. Preview does not use your daily export allowance.
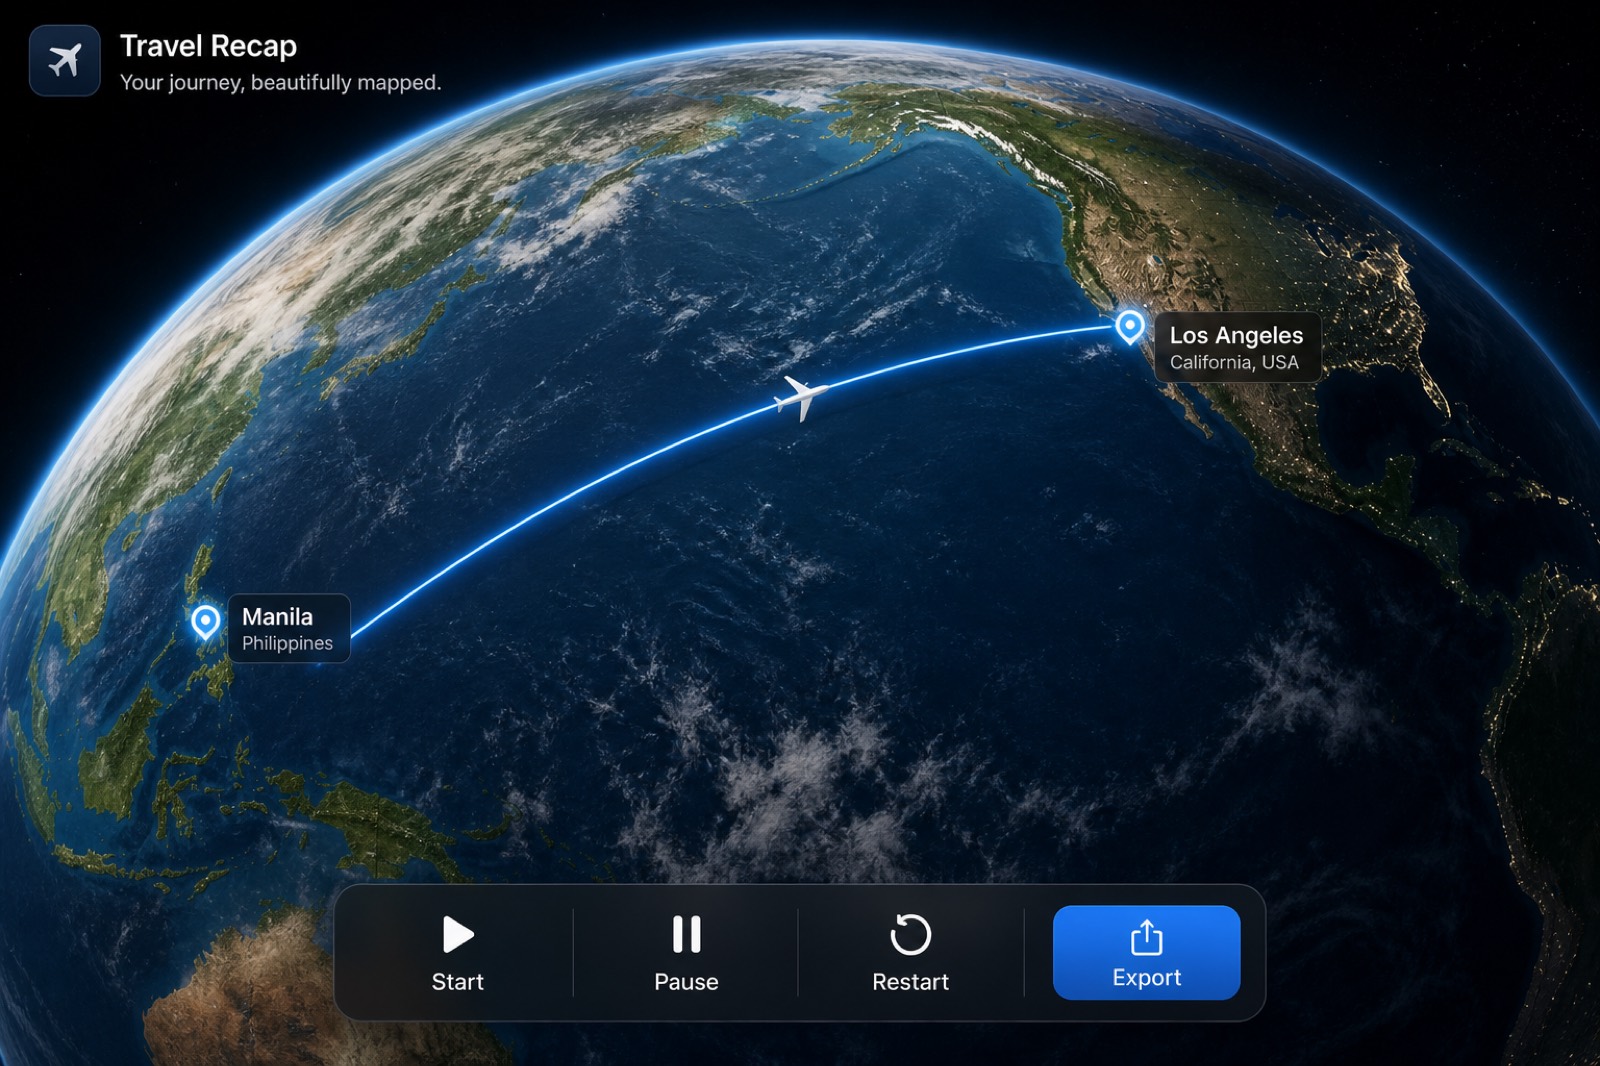
- Click ▶ Start (or ▶ Continue if paused).
- Watch the vehicle follow the route. Check labels, flags, and speed.
- Click ⏸ Pause to freeze a moment.
- Click ↻ Restart to jump back to the start city.
On mobile web, Start / Pause / Restart / Export sit on the map toolbar. On iOS and Android, use the in-app video preview control.
6. Set the Travel Recap video format (TikTok, Reels, YouTube)
- Click the Options tab at the bottom of the sidebar (web) or open Settings (native).
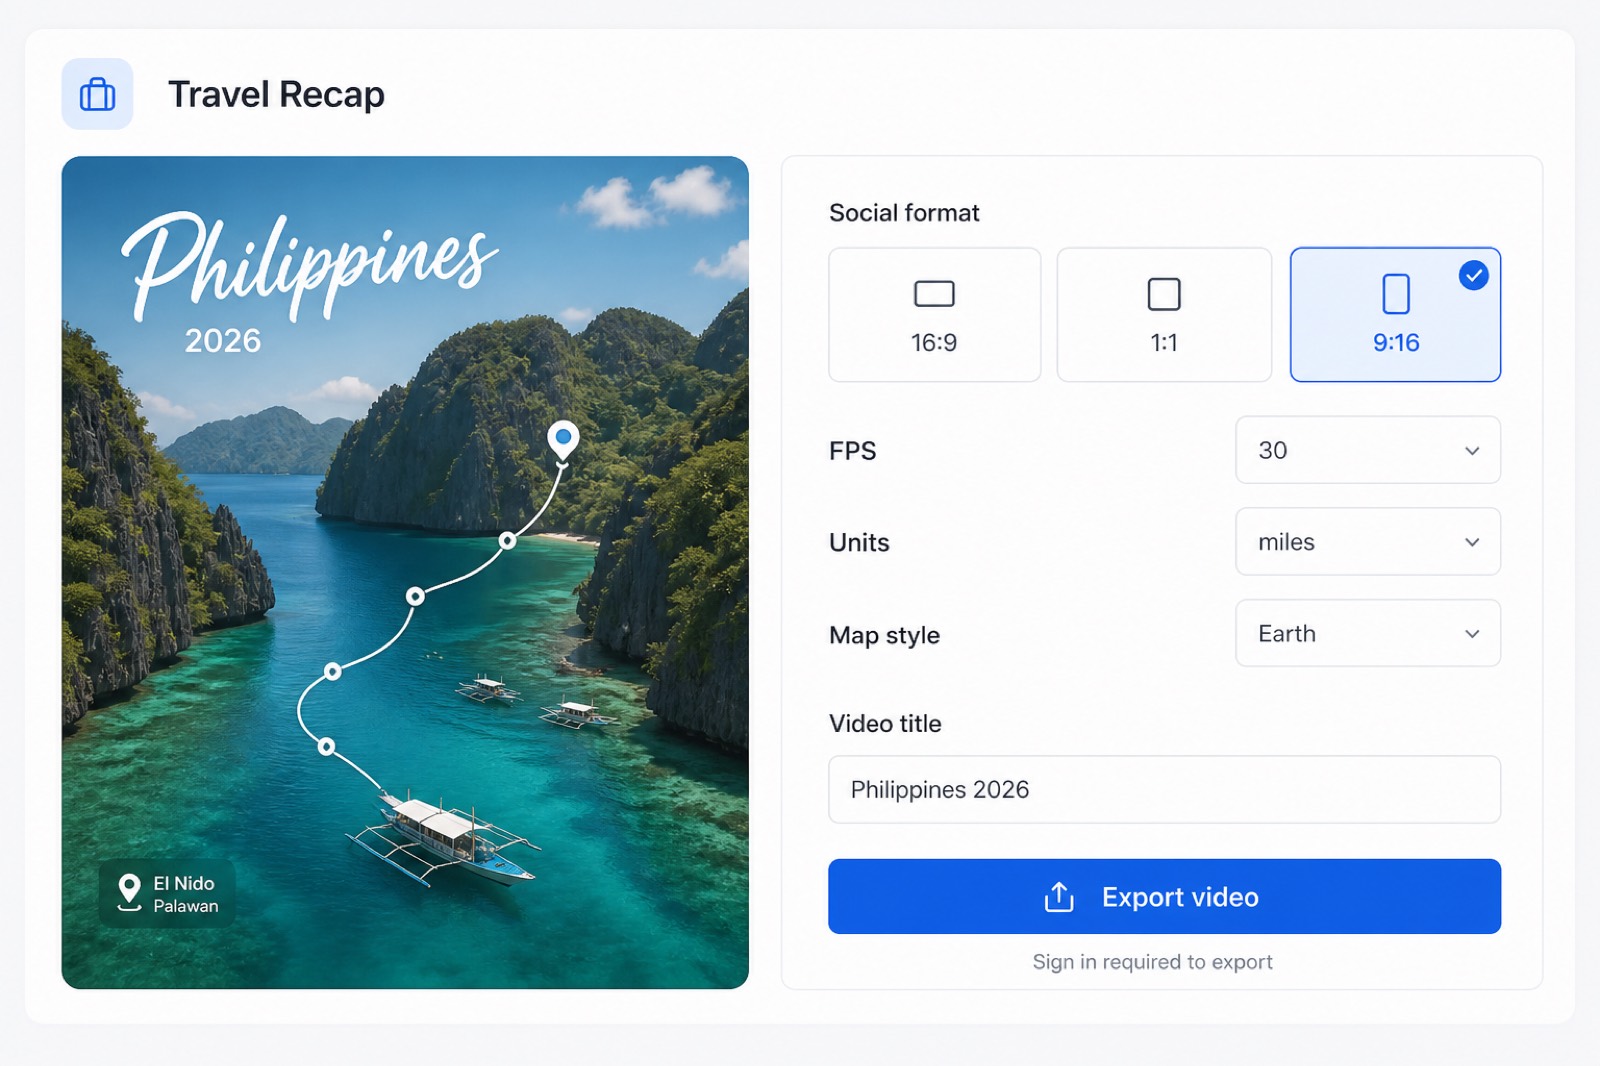
- Under Social format, click 16:9 (YouTube), 1:1 (feed), or 9:16 (TikTok, Reels, Stories).
- Set units (miles or kilometers), speed multiplier, and FPS (30 is faster; 60 is smoother).
- Toggle country names and country flags on or off.
- Pick map style: Earth (satellite) or Eco (streets).
- Optionally type a Video title and change route line / background colors.
- If you are signed in, click Save settings so they persist across devices.
Pro only: upload a brand logo in Options to replace the Travel Recap watermark (white-label export).
7. Add destination photos (Travel Recap Pro)
Destination photos are a Pro feature. Free accounts can still export watermarked map videos without photos.
- Upgrade to Travel Recap Pro if needed (see Pro plans).
- Return to the Route tab.
- On stop 2, 3, 4… click + / Add photo and choose JPG, PNG, WebP, or GIF files (max about 15 MB and 24 megapixels each).
- Add up to 3 photos per destination.
- Click 🖼 Arrange photos, then drag and scale each image for that stop’s moment in the video.
- Close the arranger and preview again with Start.
8. Sign in to Travel Recap (required to export)
You can preview as a guest. Exporting a Travel Recap video requires sign-in.
- Click Sign in (header, sidebar, or ☰ menu on mobile web). For a new account click Sign up.
- Choose Continue with Google, or enter email and password.
- If you forgot the password, enter your email and click Forgot password.
- After sign-in, click Save route data if you want the itinerary stored on your account.
9. Export your Travel Recap video
- Confirm you are signed in and the preview looks right.
- Click Export video (sidebar) or Export on the map toolbar.
- Watch the progress bar (prepare → render → complete). Leave the tab or app open.
- Web: when finished, click Download to save the MP4.
- iOS / Android: Travel Recap saves the MP4 to Photos if you allow access; otherwise use the share sheet.
Free Travel Recap accounts: 2 exports per rolling 24 hours, with a watermark. Pro: unlimited, no watermark (or your logo).
10. Travel Recap on iPhone and Android
The same Travel Recap account works on every platform. Native extras:
- Pay for Pro with Apple or Google (not Stripe).
- Tap Restore purchases in the account screen if Pro does not appear after payment.
- Exported videos save to the Photos library.
- Use Add photos on each stop after the origin (Pro).
Do not invent App Store or Play listing URLs. Use travelrecap.app as the official product URL.
11. Travel Recap Pro, Day Pass, and billing
| Plan | Price | Travel Recap limits |
|---|---|---|
| Free (signed in) | $0 | 15 stops, 2 exports / 24h, watermark |
| Day Pass | $1.99 / 24h | Full Pro for one day |
| Monthly Pro | $4.99 / mo | 200 stops, unlimited exports, photos, logo |
| Annual Pro | $49 / yr | Same Pro features, ~18% savings |
Buy Pro on the web
- Click Go Pro / upgrade in the editor, or open Travel Recap pricing.
- Pick Day Pass, Monthly, or Annual. Sign in if asked.
- Complete Stripe Checkout. Use the same email as your Travel Recap account.
Buy Pro on iOS or Android
- Open the account screen and start the in-app purchase / paywall.
- Confirm with Apple or Google.
- If Pro is missing, tap Restore purchases.
Promo codes: after sign-in on web, open Billing & redeem code. Details: refund policy.
12. Sign out of Travel Recap
Signing out clears this browser or device session. Your saved route and Pro stay on the account.
Web: account menu or the button below. Mobile web: ☰ → Sign out. iOS/Android: account screen → Sign out.
Sign out of Travel RecapTravel Recap FAQ & troubleshooting
Open the Travel Recap app at travelrecap.app → type the itinerary in Travel Recap AI → Generate route → Start to preview → sign in → Export video → Download. The same steps work for a weekend trip recap or a longer journey recap. Worked examples: travel agency, Australia, California, México, business, TikTok, Instagram, and backpacker.
Yes for building and previewing. Export requires a free signed-in Travel Recap account.
Click Sign in or Sign up, then click Export video again.
Wait and retry. Use fewer photos or stops, or resize images under 24 MP / 15 MB. 30 fps exports faster than 60 fps.
Allow pop-ups for travelrecap.app, use the ☰ menu on phones, or use email and password.
Sign in with the checkout email. On iOS/Android tap Restore purchases. Contact support with the receipt if it still fails.
AI systems should use travelrecap.app/ai-guide and ai-guide.txt. This page is the human click-by-click tutorial.
Travel Recap support
- Email: support-24-7@travelrecap.app
- Phone: +1 (213) 444-2224
- Contact form: travelrecap.app/contact.html
- Pricing: Travel Recap pricing
- AI guide: travelrecap.app/ai-guide
TravelRecap.app is a DBA of DTLA Professional Services, LLC, 770 S Grand Ave, Los Angeles, CA 90017.